foooooood: no need to knead!
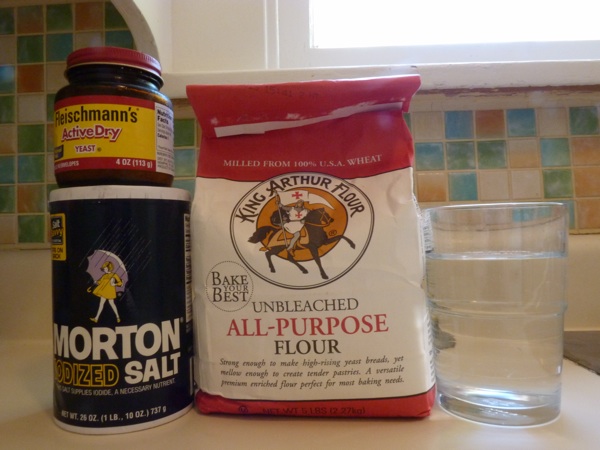
You’ll need flour, yeast, salt, and water. A pan of some sort (it could be a cookie sheet or a cast iron skillet or whatever you have on hand that has no plastic bits that’ll melt in the oven—no need for a legit bread pan) and something to grease the pan with (unless it’s nonstick). And then a big plastic container, a tablespoon, a measuring cup, and a mixing spoon. Das it. Donezo.
Lots of complicated ingredients.
Okay.
STEP ONE: Get three (3) cups of warm water, pour ‘em in your big plastic container, add a tablespoon (1 tbsp) of salt and tablespoon and a half (1.5 tbsps) of yeast. I’ve heard different opinions on whether you let this mixture sit for a couple of minutes to give the yeast time to get happy. I let it sit while I measure out the flour ‘cuz I figure it can’t hurt. (A sidenote here: I recommend you get a big-ish container of yeast instead of the little packets for two reasons: first, those packets have about two and quarter teaspoons in them. It’s a good amount for a lot of other recipes, but impractical for the recipe at hand. Second, you’re gonna want a lot of yeast because as soon as you make this bread you’re gonna want to make it again. And again.)
STEP TWO: Measure out sevenish (7ish) cups of flour. I do this in a seperate bowl to give the yeast (the aforementioned) time to get all bub’ly in the warm water, ‘cuz it takes all of two seconds to rinse out a bowl that only had flour in it. (Another sidenote: what’s up with the sevenish cups, huh? Well if you dip the measuring cup into the flour and then level it off, you’ll probably only need about six and a half (6.5) cups of flour. If you do what I do, which is use a spoon to scoop the flour out of the bag and into the measuring cup, the flour’s not packed down as much so you’ll need seven (7) cups. And that’s what’s up.)
STEP THREE: Dump the flour into the water/salt/yeast mixture. Mix it up thoroughly until there are no clumps of flour. The dough will be pretty wet.
STEP FOUR: Put the lid loosely on your container and let it rise at room temp for an hour and a half or two hours. Then transfer it to the fridge and let it hang out there for at least a couple of hours… Or overnight… Or for a few days. Whatever. Basically, for some science-y reason, the dough is just getting tastier and tastier the longer you let it sit. When you can’t stand it any longer… Move on to step cinco.

Mad dough.
STEP FIVE: Preheat yr oven to 450°. Grease yr pan. Grease yr handz. Grab a fatty chunk of the dough (probably about half of it) and plop it in the aforementioned pan. Shape the dough a lil if you feel so inclined, or don’t. Score it with a knife if you want to, makes it look profesh.
STEP SIX: Put the dough in the oven. Bake it for 25 minutes at 450° and 5-10 minutes at 500°. The extra heat at the end there gives the bread a prettier golden crust, but if you’re lazy, like I sometimes am, you can just bake it for 30-35 minutes at 450° and it’ll still be awesome. Then take your bread out of the oven, dump it out onto a cookie rack or your stovetop, let it cool for maybe five minutes or more if you can bear it, and then… Eat the shit out of the bread. You can thank me later!!! (Oh and by the way, you still have a whole loaf’s worth of dough still chillin’ in your fridge, waiting to be baked. Best. News. Ever.)
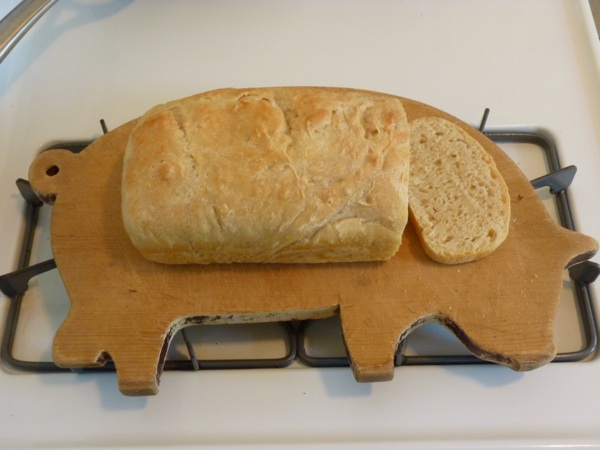
Holy yum! (Cute cutting boards make everything taste better, too. FYI.)
Category: Zocalo Hannah


